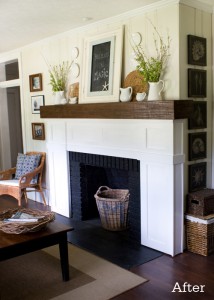
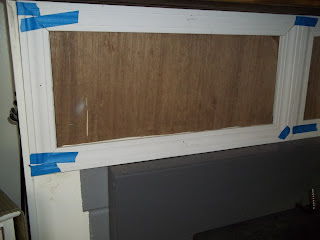
Only difference is that I have a wood burning insert instead and it's staying. My insert is a real workhorse! It gets ALOT of use during the cold months so I was skeptical about painting anything around it WHITE. I was absolutely determined to use materials that I already have. Sometimes I am just plain stubborn. I kept telling myself...this is cake...you can do this. I have not been too successful cutting angles in the past but...I can do this! So, I started with the mantel. What do I have in my pile of wood that will be long enough?? I found privacy fence pickets that were left over from last years fence repair job. I am not buying L-brackets to hold these together! Then, I rummaged through some curtain hardware and found L-shaped-ish mounting brackets. Simply made a box, sanded with my palm sander, stained it and mounted it on the existing decorative wood brackets (after cutting those down to slip inside the box). Easy peasey! Now, how do I replicate that molding? Quarter-round... old picture frames?? Ah... door molding! I got to work with the miter saw. I decided to scale back the molding because there is a one inch difference on either side of the insert. Maybe less...will be more? Oh, I also used liquid nails to adhere underlayment behind the molding because there was a sandstone trim going around the metal cover that I wanted to eliminate. In order to level the backing I used wood shims. Blah...blah...blah. Project is moving along...
Can't wait to figure out what to do on the sides! Decisions...decisions.


No comments:
Post a Comment